
Let's be honest. The rallying cry to "write the docs" usually starts with the best intentions and ends in a pit of frustration. A developer-centric workflow using Git sounds powerful on paper, but in practice, it often throws up a massive wall for the very writers and subject matter experts you need on board. The process breaks down, and friction grinds everything to a halt.
Why Your Documentation Workflow Is Broken
Staring down the barrel of a command line just to fix a typo is a soul-crushing experience, yet it’s the reality for many documentation workflows. This friction isn't just a minor annoyance; it carries a real business cost. Every hour a developer wastes trying to figure out a confusing API, or a support agent spends answering a question the docs should have covered, is a direct hit to productivity and your bottom line.
The root of the problem is a fundamental mismatch between the tools and the people. Git-based systems are brilliant for code—they give developers version control and seamless collaboration. But for non-technical contributors like marketers, product managers, or even some technical writers, they can be a nightmare. Expecting them to be comfortable with git pull, git commit, and resolving merge conflicts is often a non-starter.
The Hidden Costs of Inefficient Documentation
This technical barrier creates a serious bottleneck. It slows down updates and actively discourages contributions from the people who often have the clearest view of what users actually need. The inefficiency snowballs, leading to outdated guides, inaccurate examples, and a support ticket queue that just keeps growing. What looks like a robust technical solution on the surface ends up creating more problems than it solves.
The financial impact here is staggering. While documentation was once an afterthought, it's now a strategic asset directly tied to developer productivity. A 2018 Developer Survey from Stack Overflow revealed that over 60% of developers lose at least 1–3 hours per week to bad or missing docs, and about 20% lose more than 5 hours.
For a 50-person engineering team, getting back just two of those hours per person each week can add up to well over $700,000 in annual productivity. This proves that organizations aren't just writing docs anymore; they're investing heavily in how those docs get created and maintained. You can learn more about the sheer scale of the document management market and its operational impact.
The best documentation workflow is one nobody even notices. It should empower subject matter experts to contribute easily without forcing them to become Git gurus. The goal is to make sharing knowledge as seamless as writing an email.
This is a familiar scene for anyone who's been stuck in a clunky documentation process.

It perfectly captures that feeling of hitting a wall with a technical process that should be simple, driving home the need for a more accessible approach.
Bridging the Technical and Creative Gap
To really succeed when you write the docs, you need a system that closes the gap between technical power and creative accessibility. The ideal setup keeps all the good parts of Git—like version history and automated publishing—but layers a user-friendly interface on top for content creation. This kind of hybrid approach empowers everyone on the team to contribute, which ultimately leads to better, more accurate, and genuinely helpful documentation for your users.
Building a Practical Documentation Content Strategy

Great documentation never just happens by accident; it’s always the result of a deliberate, thoughtful strategy. Before you even think about writing a single word, you need a blueprint. This plan is what keeps your efforts focused, consistent, and genuinely helpful to the people who will actually be using your product.
Without a solid content strategy, your docs can quickly devolve into a sprawling, disorganized mess of articles. With one, you can build a cohesive resource that guides users from their first "hello world" all the way to mastering advanced features. Honestly, this initial planning is the most important part of getting things right if you want to write the docs for the long haul.
Define Your Audience Personas
You can’t write for everyone at once. When you try, the content ends up so generic that it’s not really useful to anyone. The first real step is to pin down your primary audience segments with a few simple, practical personas.
Are you writing for a senior developer who just wants the API endpoint details and nothing more? Or is your user a product manager who needs to understand high-level setup and integration concepts? Each person comes to your docs with different needs, goals, and technical comfort levels.
I've found it helpful to start with a few key personas:
- The New User: They're looking for clear, step-by-step "getting started" guides and foundational tutorials.
- The Power User/Developer: This person needs detailed API references, advanced configuration guides, and deep-dive troubleshooting tips.
- The Internal Support Agent: They need fast access to common problem-solving procedures and internal knowledge base articles to help customers efficiently.
Defining these personas from the start helps you tailor the tone, depth, and structure of every article you create. You'll know exactly when to provide exhaustive detail and when to keep it concise and high-level.
Establish a Consistent Tone and Voice
Your documentation is a direct extension of your product and your brand. Using a consistent tone and voice builds trust and makes your content feel more predictable, which makes it much easier for users to absorb. You need to decide: is your brand voice formal and authoritative, or is it more casual and encouraging?
For instance, a developer-focused tool might do best with a direct, professional tone. On the other hand, a consumer app’s documentation could be more friendly and conversational. Once you make a decision, write it down in a simple style guide so everyone contributing—now and in the future—is on the same page.
A well-defined content strategy is your single source of truth. It ensures that every guide, tutorial, and API reference works together to create a seamless user experience, reducing confusion and support overhead.
Map Out Your Information Architecture
Information architecture (IA) is just a fancy term for how you organize and label your content so people can find what they need. A good IA is what makes your documentation feel intuitive. The best place to begin is by mapping out a clear content hierarchy.
A typical documentation hierarchy might look something like this:
- High-Level Guides: Think broad topics like "Getting Started," "Core Concepts," or "Installation." These are the front doors for new users.
- Tutorials and How-To's: These are action-oriented articles that walk users through a specific task, like "Setting Up Your First Project" or "Integrating with Slack."
- Reference Docs: This is where you put the granular, technical details—API endpoint definitions, parameter lists, or configuration file options.
- Troubleshooting and FAQs: A dedicated space for solutions to common problems and answers to frequently asked questions.
This kind of structure creates a logical path for users to follow as their knowledge grows. As you build out your architecture, think about discoverability. Using tags (like api, setup, billing) and clear categories can dramatically improve your site's search and help users stumble upon related content they didn't even know they needed. For a closer look at the mechanics of creating this content, our guide on how to write technical documentation offers more detailed steps.
Finally, a crucial piece of the puzzle is aligning your work with established standards. Weaving in proven code documentation best practices from the start will ensure your content is not just well-organized but also clear, maintainable, and truly valuable for your technical audience. This foundation makes future maintenance a predictable process instead of a constant fire drill.
Structuring Docs for Humans and Automation
How you structure your documentation is just as important as what you write. Get it right, and you create content that’s a breeze for people to find and understand. At the same time, you’re creating predictable, machine-readable files that your build tools can process automatically. This dual-purpose approach is the key to scaling your efforts as you write the docs.
The whole system hangs on a simple but powerful combination: the clean readability of Markdown and the organizational power of structured metadata, commonly called front matter. This little block of YAML at the top of each file is what turns a basic text document into a smart, data-rich asset.
The Power of Structured Front Matter
Front matter is where you tuck away all the important details about a document that don’t belong in the main text itself. Think of it as a set of labels telling your static site generator exactly what to do with the file. When you nail this part, you open the door to a huge amount of automation.
For instance, a static site generator like Jekyll can use front matter to:
- Build Navigation on the Fly: It can create sidebars and menus automatically just by reading a
nav_orderorcategoryfield in each file. - Power a Smart Search: The
titleanddescriptionfields can be used to build a search index that gives users genuinely helpful results. - Run Automated Content Audits: You could easily write a script to find all pages with an old
last_updateddate, instantly generating a to-do list for content that needs a refresh. - Keep Metadata Consistent: Every single page will have a perfectly formatted title, author, and date, without anyone having to remember the rules.
By treating each doc file as a structured piece of data, you stop just writing text and start building a knowledge base that can grow and adapt. Your content becomes intelligent, and your workflow gets incredibly efficient.
This move away from clunky, all-in-one content platforms toward a file-based, Git-driven approach is happening everywhere. In fact, the intelligent document processing (IDP) market—which is all about pulling structured data from documents—is expected to explode from USD 2.30 billion in 2024 to USD 12.35 billion by 2030. That growth is fueled by the very same need we see in documentation: the demand for smart, machine-readable content. You can get the full picture by reading the intelligent document processing market report.
Essential Fields for Your Documentation
While you can cook up any custom fields your project needs, there are a handful of front matter fields that form the backbone of nearly every documentation site. Getting into the habit of using these consistently from day one will save you countless headaches as your content grows.
Here’s a look at the most common fields, what they do, and a practical example for each.
Table: Essential Front Matter Fields for Documentation
A breakdown of common YAML front matter fields, their purpose, and examples for structuring your docs.
| Field Name | Purpose | Example Value |
|---|---|---|
title |
Sets the main heading (H1) and the browser tab title for the page. | Getting Started with Our API |
description |
A brief summary used for SEO meta descriptions and search results. | Learn how to make your first API call and authenticate your requests. |
last_updated |
Tracks when the content was last reviewed, helping with maintenance. | 2024-10-26 |
category |
Groups related articles together for navigation and organization. | Tutorials |
tags |
A list of keywords for filtering and improving content discoverability. | [api, authentication, setup] |
This is where a visual editor like JekyllPad really shines. Instead of asking contributors to hand-code YAML and hope they don’t make a syntax error, it gives them a simple form. This small change makes it safe and straightforward for non-technical team members to add perfectly structured content. It removes the fear factor and empowers everyone to contribute.
Tailoring Structure to Content Type
Not all docs are created equal, and your structure should reflect that. The front matter and layout for a step-by-step tutorial will naturally be different from what you’d use for a dense API reference guide.
For Tutorials: The flow here needs to be linear and guide the user forward. Use numbered headings (
## Step 1,## Step 2) and clear, action-oriented writing. Your front matter could include adifficultyfield (likebeginneroradvanced) or even anestimated_timeto set expectations.For Reference Guides: These are all about scannability and quick information retrieval. Structure them with predictable sections for things like endpoints, parameters, and code examples. In the front matter, a
versionfield is incredibly useful for tying the documentation to a specific software release.
By defining these patterns early on, you create a consistent, predictable experience for your users while making it much easier for your team to write new content. This intentional approach to structure ensures your documentation is not just well-written but also perfectly organized, serving both the people reading it and the automation that keeps it all running.
Making Your GitHub Workflow Actually Work for Everyone
Great documentation is a team effort, not a solo project. If you really want to write the docs in a way that scales and stays accurate, you need a workflow that lets everyone contribute easily—from developers to marketers. A smart GitHub workflow provides that crucial structure, turning a potentially chaotic process into something smooth and transparent.
The main idea is to ditch the "Wild West" approach where people push changes directly to your main branch. Instead, you'll build a more disciplined process around branches and pull requests. This simple shift gives you powerful version control, a clear audit trail for every single change, and a built-in review process that catches errors before they ever go live.
A Branching Strategy That Keeps You Sane
For most documentation teams, the best strategy is usually the simplest one: the feature branch workflow. With this model, every new article, major update, or small fix gets its own separate branch.
Instead of one person hoarding a massive update, you break the work down into focused, manageable chunks. For example:
- Writing a New Guide: A writer creates a branch named something like
feat/add-api-authentication-guide. All their work on that guide happens there, in total isolation from the main documentation. - Fixing a Quick Typo: A product manager spots a mistake on the pricing page. They can quickly create a branch called
fix/correct-billing-page-typoto make the one-line change. - Updating Old Screenshots: A designer is tasked with refreshing visuals, so they work on a branch named
chore/update-dashboard-screenshots-q4.
This approach keeps contributors from tripping over each other's work and makes it incredibly easy to see the status of every task. Most importantly, your main branch stays clean, stable, and always ready to deploy.
A good workflow isn't about adding red tape; it's about creating clarity. Using branches for each task ensures every change is intentional, reviewed, and traceable—all of which are non-negotiable for maintaining high-quality docs.
Using Pull Requests as Your Quality Gate
Once the work on a branch is done, the contributor opens a pull request (or PR). This is where the magic of collaboration really happens. A pull request is a formal way of saying, "Hey team, my changes are ready. Please review them so we can merge them into the main branch."
This step is your most important quality check. It's where the real review takes place:
- Peer Review: A teammate can look at the changes line-by-line, offering suggestions or catching typos you missed.
- Expert Approval: An engineer can double-check the technical accuracy of a new API guide to make sure it's correct.
- Automated Checks: Using GitHub Actions, you can automatically run tests that validate links, check for broken images, or even scan for non-inclusive language.
This simple, repeatable process ensures every piece of content gets the right eyes on it before it's published.
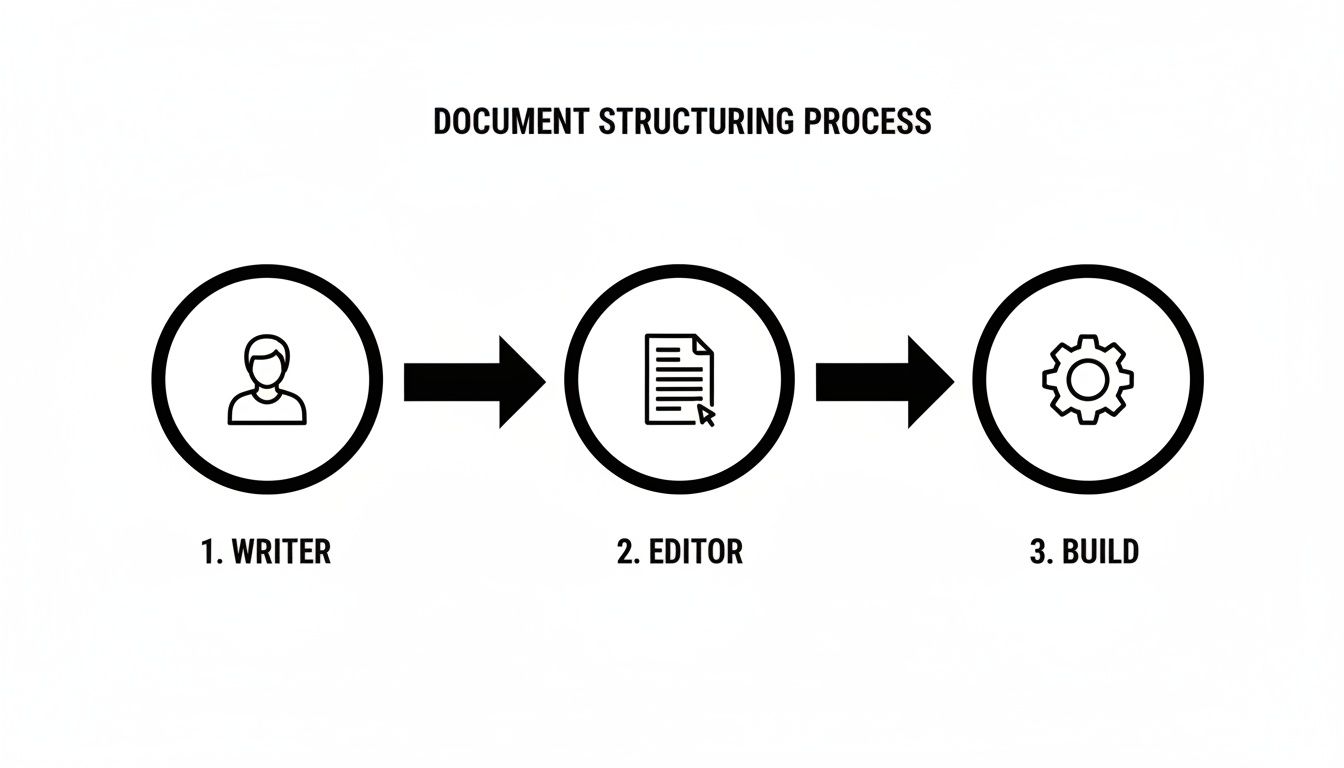
The flow is pretty clear: a writer drafts the content, an editor reviews and approves it, and then the system builds and deploys it. It’s a structured, collaborative cycle.
To take it a step further, you can even start monitoring GitHub for keyword mentions to see what your community is talking about. This can give you great ideas for what documentation needs to be written or improved next.
Closing the Gap for Non-Technical Teammates
This all sounds great for developers, but what about everyone else? This is where tools designed to simplify Git come into play. A platform like JekyllPad, for instance, plugs directly into this workflow and hides all the technical complexity.
A writer can follow the entire process without ever opening a terminal window:
- Create a Branch: They click a button in the editor to start a new branch.
- Write and Edit: They use a familiar visual editor or Markdown with a live preview right next to it.
- Commit Changes: Hitting "save" automatically creates a commit with a clear message.
- Open a Pull Request: When they're ready for feedback, they can open a PR for review, all from the same interface.
This empowers your entire team to be part of the documentation process, giving you the power of Git with the simplicity of a modern CMS. If you're looking for ways to get started, see how a GitHub-based CMS can streamline your workflow. You get all the benefits of version control and a clear audit trail, but in a package that’s accessible to everyone.
From Draft to Published: The Final Steps

Getting your content across the finish line is about more than just hitting a button. The final stages—editing, reviewing, and publishing—are where good documentation becomes truly great. This is the last quality gate, your final chance to ensure your work is clear, accurate, and genuinely helpful.
This part of the process is absolutely crucial when you write the docs because it’s where you polish the raw material. A well-defined process here prevents embarrassing typos, technical inaccuracies, and confusing instructions from ever reaching your users.
Editing With a Technical Focus
Editing technical content is a specific skill. It’s far less about poetic language and much more about precision and clarity. Your primary goal is to eliminate any ambiguity and guide the user to a successful outcome as efficiently as possible.
Whether you're editing your own work or a teammate's, keep these core principles in mind:
- Clarity Over Cleverness: Avoid jargon and overly complex sentences. If a simpler word works, use it. Remember, your user is trying to solve a problem, not admire your vocabulary.
- Use an Active Voice: Active voice is direct and empowering. Instead of "The configuration file can be edited by the user," write "You can edit the configuration file." It puts the user in control.
- Refine Code Examples: A good code example is a small, self-contained lesson. It needs to be correct, easy to copy, and focused on demonstrating a single concept. Cut any unnecessary code that could distract from the main point.
These small adjustments can make a world of difference to the user experience. Clear, direct writing builds confidence and reduces the mental energy your reader has to spend.
The Power of Peer Review
No matter how skilled you are, you can't spot all your own mistakes. A solid peer review process is your single best defense against errors. It brings a fresh set of eyes to the content, catching everything from simple typos to flawed logic that you’ve become blind to after staring at it for hours.
To make reviews more effective, create a simple checklist for contributors to run through before they ask for a review. This encourages self-editing and shows respect for the reviewer's time.
A strong review process isn't about finding fault; it's a collaborative effort to make the content better. It ensures accuracy and helps maintain a consistent voice across all your documentation.
Your pre-submission checklist could look something like this:
- Technical Accuracy: Have all commands, code snippets, and configuration values been tested?
- Clarity and Conciseness: Is the language direct? Can any sentences be shortened or simplified?
- Audience Alignment: Does the content match the intended audience's technical level?
- Formatting and Links: Are all links working? Is formatting (like headings and code blocks) correct?
- Style Guide Compliance: Does the article adhere to your team's tone and voice guidelines?
Making this a standard part of your workflow improves quality and significantly speeds up the entire review cycle.
Automating Your Publishing Workflow
Once a piece of content has been edited and approved, the last step is publishing. In a modern Git-based workflow, this process is beautifully automated. Merging an approved pull request into your main branch is the trigger that brings your content to life.
This merge can automatically kick off a build process using services like GitHub Pages, Netlify, or Vercel. These platforms will take your Markdown files, run them through your static site generator, and deploy the final HTML to a live server—often in less than a minute. For a closer look at the mechanics, our guide on how to sync your documentation with GitHub dives deeper into the process.
A key feature that ties this all together is the real-time preview. Tools like JekyllPad show you exactly what your published page will look like as you type. This completely eliminates the frustrating old cycle of pushing a small change, waiting for a build, and then realizing you have a formatting mistake. What you see is truly what you get, making the entire process faster and more intuitive for everyone.
Answering the Tough Questions About Modern Docs
Moving to a modern, Git-based workflow for documentation is a big step, and it’s completely normal to have a ton of questions. As teams ditch older systems, they almost always hit the same roadblocks and points of confusion. Getting straight answers to these common questions will make the transition feel less daunting and help you build a process that actually sticks.
This is all just part of the journey when you decide to write the docs in a more organized, collaborative way. Let's tackle some of the most frequent questions I hear to clear up the confusion.
How Do I Pick the Right Static Site Generator?
The number of static site generators (SSGs) out there can be paralyzing. The secret is to ignore the noise and focus on just three things: your project's tech stack, how much performance you really need, and what your team is comfortable with.
- For Beginners & GitHub Pages: Jekyll is almost always the best place to start. It has a massive community, fantastic documentation, and works flawlessly with GitHub Pages right out of the box. You can’t go wrong here.
- For Huge, Performance-Hungry Sites: If you’re building a documentation portal with thousands of pages, Hugo is an absolute beast. It’s written in Go and is famous for its ridiculously fast build times, often rendering massive sites in just a few seconds.
- For JavaScript-Heavy Teams: Is your team already living and breathing JavaScript? Then go with something like Next.js, Astro, or Gatsby. They offer powerful features and component-based architectures that your developers will feel right at home with.
Honestly, the best choice is the one your team will actually use without complaining. A slightly "slower" tool that everyone can contribute to is infinitely better than a "faster" one that only a single person knows how to operate.
What's the Best Way to Handle Images and Media in Git?
This is a classic problem. It’s so tempting to just drag and drop all your screenshots and videos into your Git repository, but this is a trap that can cause major headaches later. A bloated repository becomes painfully slow to clone and a nightmare to manage.
If you only have a handful of assets, committing them into a dedicated folder like /assets/images is totally fine. It’s simple, and it works. Don't overcomplicate it.
But the moment you start dealing with a large number of high-resolution images or videos, you need a real strategy. The two best solutions are:
- Git LFS (Large File Storage): This is a Git extension that stores large files on a remote server, replacing them with lightweight text pointers in your repository. It's a solid middle-ground solution, though it does add a bit of complexity.
- External Hosting (CDN or Cloud Storage): This is my preferred approach. Host your media on a service built for it, like Amazon S3 or Cloudinary. You then just drop the URLs into your Markdown files.
Using a CDN for media keeps your repository lean and fast. It also makes your site load quicker for users around the world and cleanly separates your content from your assets—a huge win for long-term maintainability.
How Should We Version Our Documentation?
If your product has multiple versions out in the wild, your documentation has to match. Showing a user docs for a feature they don't have is a fast track to confusion and a pile of frustrated support tickets. Aligning your doc versions with your software releases isn't optional; it's essential.
A simple and effective way to manage this is with Git branches. For each major release of your software (say, v1.0, v2.0, and v3.0), create a corresponding long-lived branch in your docs repository.
This effectively creates a perfect snapshot of the documentation as it existed for that specific release. From there, your live site can be set up with a version switcher, letting users pick the product version they're on. This guarantees the information they see is accurate for them, which builds trust and cuts down on needless support requests.
Ready to streamline your documentation and get your whole team involved? JekyllPad gives you a simple, visual interface on top of your Git repository, making it easy for anyone to write the docs. Try it for free and see just how smooth a modern, collaborative process can be.