
Uploading a media file seems simple on the surface, but how you handle it is a fork in the road. It’s the moment that separates a fast, professional website from a slow, clunky one. Getting your media workflow right isn't just a technical detail; it’s a core part of building a great user experience and earning strong SEO.
Why Your Media Upload Workflow Matters
Getting images, videos, and documents onto your static site should be a smooth process. A messy strategy, however, creates real friction. We’ve all seen the common pain points: sluggish load times caused by oversized images and the headache of fixing broken video links. These issues directly sabotage your site's quality.
Every unoptimized image adds to your page weight, which not only frustrates visitors but also tells search engines your site is slow. This is a bigger deal than you might think. By 2025, the world is expected to create 181 zettabytes of data each year, and videos alone are projected to make up over 53% of all internet traffic. With that much content flying around, a smart, deliberate approach to every single media file is essential.
Bridging the Gap for Static Sites
If you're using a static site generator like Jekyll or Hugo, these challenges can feel even more pronounced. The typical workflow often introduces its own set of problems.
- Command-line uploads: Pushing media files with Git can be daunting for non-technical team members and is often just plain slow for quick updates.
- Manual organization: Without a clear system, your assets folder can turn into a disorganized mess, making future updates a nightmare.
- Version control friction: Every minor image tweak requires a new commit, which can seriously clutter your project's history if you're not careful.
A thoughtful media upload process isn't just about adding a picture to a post. It's about ensuring that picture loads quickly, looks great on any device, and doesn't break six months from now.
This is exactly where a client-side tool like JekyllPad comes in. By integrating directly with your GitHub repository, it gives you a visual, simplified way to handle media that keeps your site fast and your repository clean. When you sync your workflow directly with GitHub, you can turn what was once a tedious chore into a seamless part of creating content.
Making Media Uploads Effortless with JekyllPad
Let's be honest, handling media files for a static site can be a real headache. Manually uploading images to a specific folder, getting the path right, and then writing the Markdown by hand is clunky and slow. With JekyllPad, we've made the entire process visual and completely intuitive, ditching the command line for a simple drag-and-drop.
The whole point is to get your content live faster. You can pull images, videos, documents—whatever you need—directly into the editor. It feels as natural as attaching a file to an email, which is exactly how it should be.
When your media workflow is broken, it causes a cascade of problems that can seriously hurt your site's performance and search ranking.
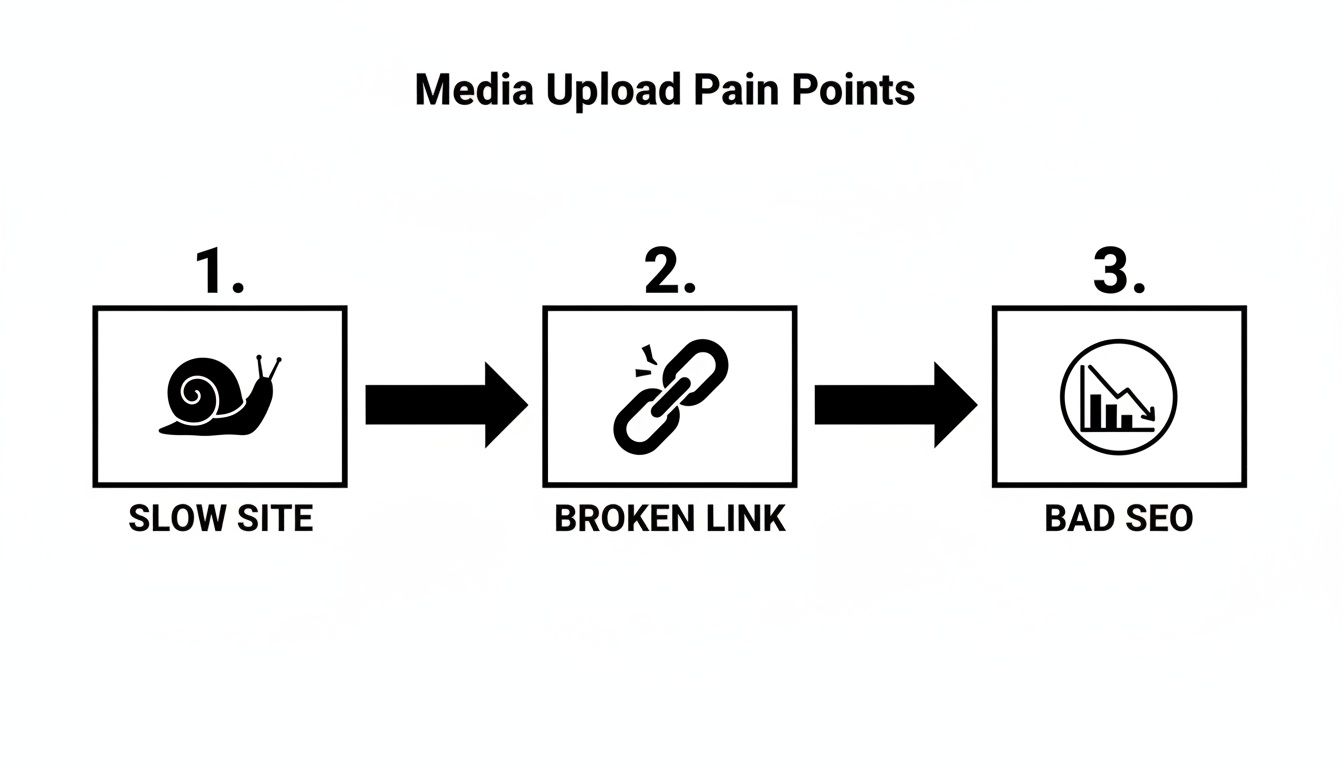
As you can see, what starts as a simple workflow issue can spiral into poor user experience and ultimately, bad SEO.
Your Visual Upload Workflow in Action
Here’s where the magic really happens. When you drag a file into the JekyllPad editor, it’s not just a temporary placeholder. The platform automatically commits that file to the correct folder in your Git repository—think /assets/images/ or a similar designated spot.
This tight integration with Git brings some major wins for your workflow:
- Zero-Effort Organization: Your files land exactly where they need to go. No more manual sorting or messy project folders.
- Built-in Version Control: Every image or PDF you upload is tracked in your Git history, giving you a complete and transparent record of all site assets.
- Rock-Solid Consistency: This automated process ensures every team member follows the same file structure, which is a lifesaver for long-term site maintenance.
The goal here is simple: close the gap between writing your content and managing the media that brings it to life. Uploading an image should be a seamless part of the creative process, not a technical detour.
From a Single Image to a Full Gallery
The beauty of this system is its consistency, whether you're adding one hero image or an entire gallery. Drop a single photo into your post, and JekyllPad instantly generates the clean, correct Markdown for you.
For instance, if you upload a file named mountain-view.jpg, you'll get this in your editor:

Need something more complex, like a photo gallery? Just drag and drop all the images at once. JekyllPad will handle the upload for each file, giving you the clean code snippets you need to arrange them using Markdown or a little bit of HTML.
This approach gives everyone what they need. Content creators get a user-friendly visual interface, while developers still have full control over the final code. This deep Git integration is really the backbone of the platform. To get a better sense of how it all connects, you can dive deeper into our guide on how JekyllPad works with GitHub.
By taking the friction out of media management, you’re free to focus on what you do best: creating great content.
Optimizing Media for Peak Site Performance
Getting your files uploaded is just the first step. The real art is making sure those files load in a flash for every visitor, and that work begins long before anything touches your repository. I've seen it a hundred times: unoptimized media is the number one reason websites crawl, killing the user experience and hurting search rankings.
It all starts with picking the right file format for the job. You're constantly balancing visual quality with file size, but thankfully, modern formats give you a ton of control. For images, this usually means looking beyond the old-school JPEGs and PNGs.
The same logic applies to audio. If you're embedding a podcast clip or a sound bite, you need to understand the trade-offs between different formats. It's a key part of choosing the right audio file format without sacrificing quality or performance.
Choosing the Right Image Format
Deciding between formats like WebP, AVIF, and JPEG can feel tricky, but it's really about matching the format to the content. Here’s a quick breakdown to help you make a smart choice every time.
| Format | Best For | Key Advantage | Consideration |
|---|---|---|---|
| WebP | Everyday web images, photos, graphics | Excellent compression, supports transparency | Now universally supported, no real downsides. |
| AVIF | High-quality photos where file size is critical | Superior compression over WebP, amazing quality | Can be slightly slower to encode. |
| JPEG | Photos (when a modern format isn't an option) | Universal support, good for complex photos | Larger file sizes for comparable quality. |
| PNG | Graphics with sharp lines or transparency (legacy) | Lossless quality, perfect for logos | Creates very large files, especially for photos. |
Ultimately, my go-to is WebP for almost everything. It strikes the perfect balance and is supported by every modern browser.
Pre-Upload Compression and Naming
Once you’ve settled on a format, the next move is compression. I can't recommend tools like TinyPNG enough. They're my secret weapon for intelligently slashing file sizes by 50-70% without any noticeable drop in quality. It’s a free, simple step that makes a massive difference in load times.
Just as critical is a smart, SEO-friendly naming convention. Never, ever upload IMG_8472.jpg. Instead, give it a descriptive, keyword-rich name like static-site-media-upload-workflow.webp. This simple change helps search engines understand what your image is about, which is great for discoverability.
Here’s my non-negotiable pre-upload checklist:
- Pick the Right Format: Go with WebP or AVIF for images to get the best quality-to-size ratio.
- Compress Everything: Run every single image through a compression tool before it gets uploaded. No exceptions.
- Use Descriptive Names: Rename your files using relevant keywords separated by hyphens.
Integrating Optimization with Your Static Site
Optimization doesn't stop once the file is in your project. Your static site generator gives you powerful tools like lazy loading and responsive images to take performance to the next level. These techniques ensure users only download the assets they need, right when they need them.
For example, implementing lazy loading is incredibly easy these days. You're just telling the browser to hold off on loading images that are offscreen until the user actually scrolls down to them. The loading="lazy" attribute is a game-changer and has wide browser support.
A simple implementation looks just like this:
<img src="/assets/images/my-image.webp" alt="A descriptive alt text" width="800" height="600" loading="lazy">
True performance is a combination of pre-upload preparation and post-upload implementation. By compressing files beforehand and using modern browser features like lazy loading, you create a site that's both visually compelling and exceptionally fast.
This two-pronged approach is what separates a decent site from a great one. When you optimize assets before they ever hit your repository and then load them intelligently on the page, you're building a faster, more enjoyable experience for everyone.
Dealing With Large Files and External Hosting
Sooner or later, every growing static site runs into the same problem: large media files. That beautiful, high-resolution video or that massive image gallery can quickly bloat your GitHub repository. It’s a classic growing pain.
When your repo gets heavy, everything slows down. Every git pull takes forever, and your project becomes a pain to manage. While keeping everything in one place feels simple at first, it's a trap that creates a lot of technical debt down the road. The smarter move is to offload these big assets to a service built for the job. This frees up your repository to do what it does best—manage code and text, not terabytes of media.
Choosing the Right External Host
So, where should you put your files? It really depends on what you're hosting. You wouldn't use the same service for a video gallery as you would for a handful of images. Each platform has its own strengths.
- For Videos: Stick with the experts. Platforms like YouTube or Vimeo are the undisputed champions here. They handle all the complex work of video compression, streaming, and providing a reliable player that just works.
- For Images: A Content Delivery Network (CDN) is your best friend. A service like Cloudinary is a powerhouse. It doesn’t just store your images; it can optimize and transform them on the fly, ensuring every user gets the perfect version for their device.
This approach is especially critical for video. In Q2 2025, YouTube was seeing over 1.1 million videos uploaded every single day. By tapping into that kind of infrastructure, your site gets world-class video delivery without putting any strain on your own setup. If you're curious, you can see what drives YouTube's massive upload volume and why it's such a reliable choice.
Decoupling your large media from your code repository is one of the best long-term decisions you can make. It keeps your site fast, your Git workflow lean, and your content scalable.
Embedding External Media in JekyllPad
Once your media is living on another platform, getting it into your JekyllPad content is surprisingly easy. Both video hosts and image CDNs give you a simple "share" or "embed" option that hands you a small snippet of code.
Here’s the typical workflow for a YouTube video:
- First, upload your video to YouTube.
- On the video’s page, click the Share button and look for the Embed option.
- Copy the
<iframe>code snippet it gives you. - Jump back into the JekyllPad editor and switch to the HTML or code view.
- Paste that snippet exactly where you want the video to show up.
That's it. This method ensures your site's performance isn't bogged down by huge files, which is a foundational principle for building fast, modern websites. It's just one piece of the puzzle, of course. For a bigger picture, check out our guide on how to use GitHub Pages to create a truly efficient static site. When you combine a lean repository with powerful external services, you've built a site that can handle rich media without any compromises.
Organizing Your Media Library for Scalability
Let's be honest, an unorganized assets folder is a ticking time bomb. It's a classic form of technical debt that will eventually make future updates a nightmare. Think of it like a messy workshop—sure, you can find that one tool you need, but every single task takes ten times longer than it should.
Putting a solid media organization strategy in place from day one is one of the best things you can do for your project’s long-term health. It's a simple step that prevents broken links, makes maintenance a breeze, and helps anyone else on your team find what they need without a map. Instead of just dumping every media file upload into a single /images folder, we can do better.
Structuring Your Asset Folders
I've seen a few proven methods for structuring media folders over the years. The "best" one really just depends on your site's content. The most important thing is to pick a system and stick with it religiously.
Here are a couple of popular strategies that work well in practice:
- By Content Type: This is the most common starting point. You create top-level directories like
/assets/images/,/assets/videos/, and/assets/documents/. It’s clean, intuitive, and perfectly fine for smaller sites. - By Post Slug: Now, for content-heavy sites like blogs, this approach is a total game-changer. Each article gets its own media folder, something like
/assets/images/my-awesome-post/. This keeps all related assets for a single piece of content bundled together, making it incredibly easy to find or update them months or even years later.
A well-organized media library isn't just about being tidy. It’s a core part of building a maintainable website. As your site grows, this system ensures that finding and managing your assets remains a simple, predictable task, not a frustrating treasure hunt.
Adopting a Consistent Naming Convention
Your folder structure is only half the battle. The other half is a sane, consistent file naming convention. This isn't just for you; it's also great for your site's SEO.
A file named organizing-media-library-jekyllpad.webp tells you and search engines exactly what it is. photo_01.jpg tells you nothing.
I've always found a simple formula works best:
[primary-keyword]-[secondary-keyword]-[unique-identifier].extension
So, an image for this very section could be named media-file-upload-folder-structure.webp. It's instantly recognizable and searchable within your project. When using JekyllPad, you can get into the habit of renaming files before you drag and drop them. This ensures every media file upload lands in your repository correctly named and ready to use. It’s a small habit that pays off big time in clarity and efficiency down the road.
Common Questions About Media File Uploads
Even when you've got a great system in place, questions always pop up. It's just part of the process. Let's dig into some of the most common things people ask about handling media files in JekyllPad and other static site setups. Getting these answers sorted out now will save you a ton of headaches later.
One question we see a lot isn't just about the upload itself, but what comes next. People often want to know how they can upload images for quick AI analysis or run other checks, which really speaks to the need for a smooth, integrated content workflow.
Can I Upload File Types Other Than Images And Videos?
Of course. Images and videos get all the attention, but JekyllPad can handle any file type your site might need. Think PDFs for whitepapers, MP3s for podcast episodes, or even ZIP archives for downloadable assets.
The process is identical to uploading an image. You just drag the file into the editor, and it gets added to your repository. Then, you can link to it with standard Markdown, something like Download Our Annual Report. It's that simple. This makes JekyllPad a true central hub for all your site's content, not just the visual stuff.
Is There A File Size Limit For Uploads?
This is a big one. While JekyllPad itself doesn't impose a limit, you're ultimately working within the rules of your Git provider, which for most people is GitHub.
GitHub has some pretty firm guidelines here. They strongly recommend keeping files under 50 MB and will flat-out reject any single file over 100 MB. That's not a suggestion—it's a hard limit.
This is why you'll hear seasoned developers say to never store large videos or huge, uncompressed images directly in your repository. For those heavy-hitters, using an external service like YouTube, Vimeo, or a dedicated CDN is the way to go. It keeps your repository lean and fast and prevents frustrating push failures.
How Does JekyllPad Handle Image Paths If I Move A Post?
This question really gets at the core of building a site that won't break as it grows. The good news is that JekyllPad uses relative paths from your site's root directory, which is exactly what you want for a static site.
When you drop an image in, the Markdown path will look something like this: ``.
Because that path starts from the root of your site (the /), it doesn't matter where your post's Markdown file lives. You can shift it from /_drafts to /_posts or into a subfolder, and the image link will still work perfectly. It's a small detail that saves you from the nightmare of broken images down the road.
What Happens If I Upload A File With A Duplicate Name?
Since JekyllPad is built on top of Git, its behavior is a direct reflection of how Git works. If you upload a file into a directory where a file with the exact same name already exists, it will simply overwrite the old one.
This is actually a pretty handy feature for updating things. Say you need to replace an old diagram with a revised version. Just give the new file the same name, upload it to the same spot, and every post linking to it will automatically display the updated graphic. No need to hunt down and edit old links.
Just be careful. If you need to keep both the old and new versions, make sure you rename the new file before you upload it.
Ready to simplify your media workflow and focus on creating content? JekyllPad provides a seamless, visual interface for managing your static site, integrating directly with your GitHub repository. Start for free on JekyllPad.