
So, what exactly is GitHub Pages? Think of it as a free hosting service that grabs HTML, CSS, and JavaScript files directly from a repository on GitHub and turns them into a live website. It's a remarkably efficient way to host static websites—like portfolios, blogs, or project documentation—right from where your code lives.
What Are GitHub Pages and Why They Matter
At its heart, GitHub Pages is a powerful tool for spinning up websites from your code repositories. Since it first launched back in 2008, it's become a favorite for developers, open-source projects, and technical writers. It strips away the usual complexities and costs of traditional web hosting, making it dead simple for anyone to get their content online.
The service is built specifically for static sites, which are websites constructed from a fixed set of files. This is a big difference from dynamic sites that need server-side code and databases to function. By sticking to static content, GitHub Pages delivers huge wins in speed, security, and simplicity. If you're new to this concept, our guide on what a Static Site Generator is is a great place to start.
The Core Benefits of Using GitHub Pages
So what's the big deal? Why has GitHub Pages become so popular? It comes down to a few key advantages that fit perfectly into how we build things today.
- Zero-Cost Hosting: It’s completely free for public repositories. No hosting bills, period. This makes it ideal for personal projects, open-source docs, or a professional portfolio you don't want to pay to maintain.
- Seamless Git Integration: Your website is managed with Git, the same version control you're already using for your code. Every update is just a commit, giving you a full, revertible history of your site.
- Enhanced Security: Serving only static files massively shrinks the potential for attacks. With no database or server scripts to exploit, your site is naturally much safer than a dynamic one.
- Simplicity and Speed: Getting your site live is as easy as pushing code to a specific branch. GitHub handles all the backend infrastructure, ensuring your content loads quickly for visitors anywhere in the world.
GitHub Pages has carved out a solid niche, powering 0.2% of all websites with a known CMS. And when you consider that over 90% of Fortune 100 companies are on GitHub, you can bet a lot of their internal project sites and documentation rely on Pages for its reliability and easy integration. You can dig into more stats over at W3Techs.
Understanding GitHub Pages Hosting Models
Before you start publishing, you need to know about the two main ways GitHub Pages sites are structured. This decision impacts your repository setup and what your final URL will look like. A quick comparison can help you decide which approach is right for your project from the very beginning.
| Site Type | Repository Naming Convention | Published URL | Best For |
|---|---|---|---|
| User/Organization Site | your-username.github.io |
https://your-username.github.io |
A central portfolio, blog, or an organization's main landing page. |
| Project Site | any-repo-name |
https://your-username.github.io/any-repo-name |
Documentation, demos, or individual websites for specific projects. |
For a User or Organization Site, you get just one per account, and the repository must be named precisely username.github.io. The content from the main branch goes live at that root URL.
Project Sites, on the other hand, are for individual projects. You can have as many as you want. They're typically published from a gh-pages branch within a standard repository and live at a subpath, like username.github.io/my-cool-project.
Choosing the right type upfront will save you headaches later and keep your work organized as you build more things.
Getting Your First Site Live from a Repository Branch
The most direct way to get your website up and running on GitHub Pages is by publishing straight from a repository branch. This classic method is perfect for simple static sites where you don't have a complex build process. Honestly, it's the first thing you should master when you're starting out.
Your game plan will shift a bit depending on whether you're building a personal User site or a Project site. Each has its own rules about which branch and repository name to use, and getting this right from the start saves a lot of headaches.
Publishing a User or Organization Site
Think of this as your main hub—your personal portfolio or your organization's landing page. A User or Organization site is special because it’s tied directly to your GitHub handle (like username.github.io) and lives at that root URL.
The setup for this is super specific, but also super simple:
- First, you need to create a new repository and name it exactly
your-username.github.io. - Then, push your site's files—your
index.html, CSS, images, and whatever else—directly to themainbranch.
And that's it. Seriously. GitHub is smart enough to see that specific repository name and automatically deploys everything from the main branch. You don't have to fiddle with any source branch settings; the convention does all the heavy lifting for you.
Configuring a Project Site from a Branch
Project sites are where things get more flexible. You can spin one up for every single repository you own, making them perfect for project documentation, a live demo for a library, or a standalone microsite.
To get started, head over to your repository on GitHub and click the Settings tab. Look for Pages in the left sidebar—this is your command center for everything related to your site.
You'll see the "Build and deployment" source is already set to "Deploy from a branch." We'll stick with that. Now you just have to decide where your site files will live.
Pro Tip: If your site deploys successfully but you're hitting a 404 error, the problem is almost always in your repository settings. Double-check that your source is set to "Deploy from a branch" and that you've selected the correct branch and folder.
The Classic gh-pages Branch
By far the most common convention is to use a dedicated gh-pages branch. I'm a big fan of this approach because it creates a clean separation between your source code and the final, published website files.
- Your
mainbranch stays clean, holding your source files, markdown, and development assets. - Your
gh-pagesbranch contains only the built, static files (index.html,style.css, etc.) that visitors will actually see.
To make this happen, just select gh-pages from the branch dropdown and leave the folder set to / (root). Once you hit save, GitHub will only look at that branch for your website content.
The main Branch and /docs Folder Method
What if managing a whole separate branch feels like overkill? No problem. You can publish directly from your main branch. But to keep your repository from becoming a mess, you'll want to use the /docs folder option.
This setup lets you keep your final website files tucked away inside a docs folder on your main branch. It's a really tidy solution.
When does this make the most sense?
- You're keeping project documentation right alongside the code it describes.
- Your site is simple enough that a
gh-pagesbranch is just extra work. - You prefer having a single source of truth in one branch.
To set this up, select the main branch from the dropdown, then switch the folder from / (root) to /docs. Now, GitHub will ignore everything else and publish only what's inside that specific folder. It’s an elegant way to keep your project organized while still using the simple branch-based deployment.
Automating Your Deployments with GitHub Actions
While managing a gh-pages branch by hand is a decent place to start, it's not how modern development gets done. The real magic of using GitHub Pages today is in automation, and that's where GitHub Actions comes in. It’s a powerful CI/CD (Continuous Integration/Continuous Deployment) tool baked right into your repository, and it’s a total game-changer.
If you're just working with a few simple HTML files, manual updates are fine. But the moment you bring in a static site generator like Hugo, Astro, or Eleventy, you’ve got a critical extra step: the build process. You're not writing the final HTML; you’re creating source files (like Markdown) that need to be compiled into a finished site. Automating this whole process means every push to your main branch can trigger a fresh, error-free build and deployment without you lifting a finger.
This diagram shows just how simple the flow becomes once you have automation set up.
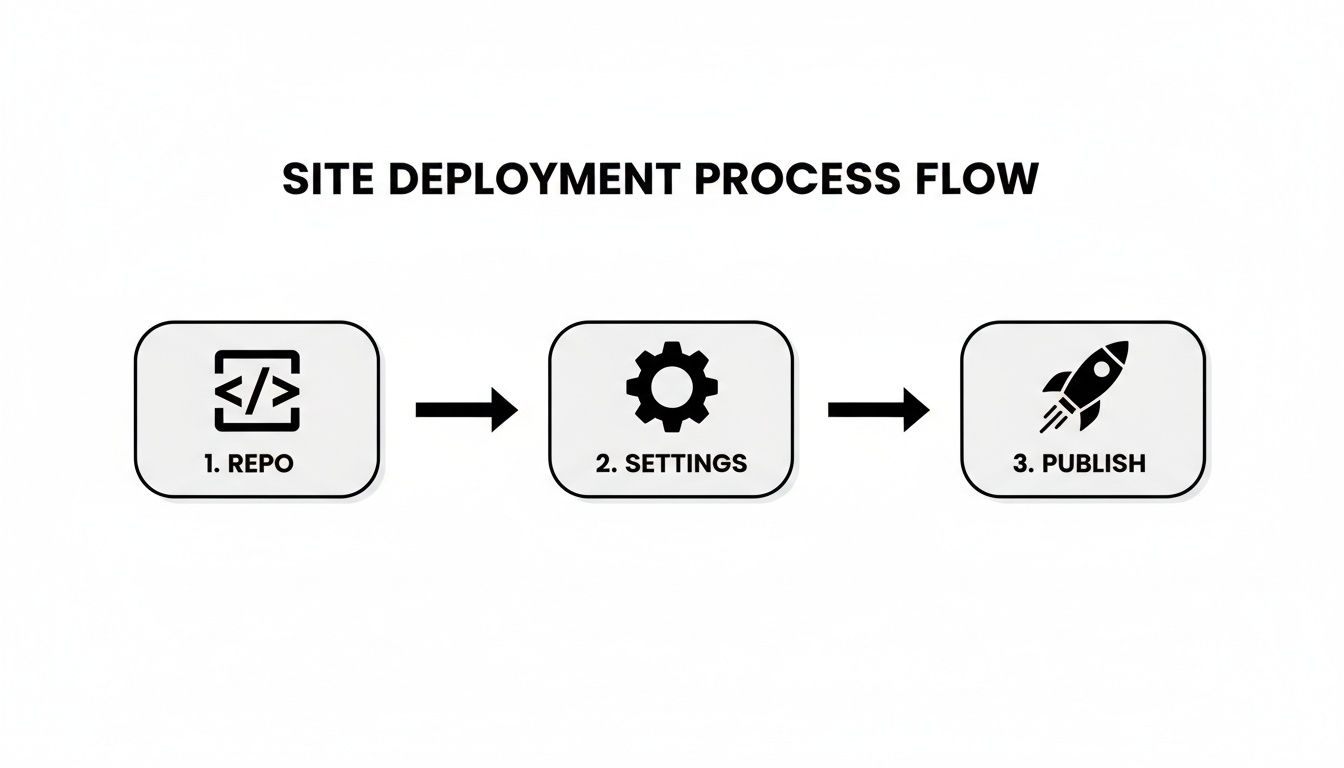
It’s a completely hands-off process: you commit your code, GitHub Actions takes over, and your site goes live. No more manual branch wrangling.
Understanding the Workflow File
The heart of every GitHub Action is a YAML workflow file. This file lives in a special directory within your repository: .github/workflows/. You can name the file whatever you want (like deploy.yml), and it's where you define exactly what GitHub should do and when it should do it.
This isn’t just about convenience; it’s a professional standard. Since its quiet debut in 2008, GitHub Pages has become a pillar of the static site world. With over 100 million developers on the platform, Pages hosts sites for more than 20% of public repositories. Automation through Actions meets a huge community need, making it possible to build sophisticated pipelines for everything from simple deployments to complex analytics.
The YAML file is structured into a few key sections that work in harmony to create your deployment pipeline.
Building a Practical Deployment Workflow
Let's walk through a complete, real-world example of a workflow file designed to build and deploy a static site. This annotated snippet breaks down what each part does so you can see how it all fits together.
A well-structured workflow file is your recipe for automated success. The table below explains the essential ingredients you'll find in almost every deployment script.
Key Sections of a GitHub Actions Workflow File
This table breaks down the essential components of a typical deployment workflow, explaining the purpose of each section so you can build your own with confidence.
| YAML Key | Purpose | Example Usage |
|---|---|---|
name |
Gives your workflow a human-readable name that appears in the Actions tab of your repository. | name: Build and Deploy Site |
on |
Defines the trigger event. This tells GitHub when to run the workflow. | on: push: branches: [ main ] |
jobs |
Groups one or more tasks, or "jobs," that run in parallel or sequentially. | jobs: build-and-deploy: |
runs-on |
Specifies the type of virtual machine (or "runner") to execute the job on. | runs-on: ubuntu-latest |
steps |
A sequence of individual tasks to be executed within a job. Each step can be a command or a pre-built action. | steps: - uses: actions/checkout@v4 |
uses |
Pulls in a pre-built, reusable action from the GitHub Marketplace or another repository. | uses: peaceiris/actions-gh-pages@v3 |
with |
Provides input parameters to an action. | with: publish_dir: ./_site |
run |
Executes a command-line script. | run: npm run build |
Understanding these keys is the first step to customizing workflows for any project you can imagine.
Now, let's see them in action.
.github/workflows/deploy.yml
name: Build and Deploy to GitHub Pages
on: push: branches: - main # Trigger the workflow on pushes to the main branch
jobs: build-and-deploy: runs-on: ubuntu-latest # Use a fresh virtual machine for the job steps: - name: Checkout code uses: actions/checkout@v4 # This step checks out your repository's code into the runner
  - name: Set up Node.js
    uses: actions/setup-node@v4
    with:
      node-version: '20'
    # Sets up the specific Node.js version your project needs

  - name: Install dependencies
    run: npm install
    # Runs the command to install all project dependencies

  - name: Build the site
    run: npm run build
    # Executes your build script (defined in package.json)

  - name: Deploy to gh-pages
    uses: peaceiris/actions-gh-pages@v3
    with:
      github_token: ${{ secrets.GITHUB_TOKEN }}
      publish_dir: ./dist
      # This action pushes the contents of the 'dist' folder to the gh-pages branch
This workflow is a solid template that works for most modern static site projects right out of the box.
The
peaceiris/actions-gh-pagesaction is a community-built powerhouse. It handles creating thegh-pagesbranch if it doesn't exist, committing the build artifacts, and pushing them back to your repository—all in one clean step.
Customizing the Workflow for Your Project
While the example above is a fantastic starting point, you'll almost certainly need to tweak it for your specific static site generator. The main changes usually pop up in two places: the build command and the output directory.
- For Hugo: Your build command is likely just
hugo, and the output folder is typically./public. - For Jekyll: The command is often
bundle exec jekyll build, with the output landing in./_site. - For Eleventy: You'll probably use
npx @11ty/eleventy, and the default output also goes to./_site.
Just adjust the run command for your build step and the publish_dir in the final deployment step to match your tool's conventions. This level of control is what makes GitHub Actions so incredibly flexible.
Once you set up this automated pipeline, you have a reliable system in place. You can get back to focusing on your content and code, confident that every push will seamlessly update your live site. For a deeper look at how this fits into a content management strategy, check out our guide on how you can sync your work with GitHub.
2. Connecting a Custom Domain and Enabling HTTPS
While your username.github.io address works perfectly fine, a custom domain gives your site a polished, professional identity. Hooking up your own domain to a GitHub Pages site might sound complicated, but it's really just a two-part process: first, you'll tweak some settings with your domain registrar, and then you'll let GitHub know what you've done.
Of course, before you can connect a domain, you need to own one. If you're still looking for the right fit, it's a good idea to check domain name availability to find something that perfectly represents your project.
Configuring Your DNS Records
First things first, you'll need to log into your domain registrar—that's wherever you bought your domain, like GoDaddy, Namecheap, or Google Domains. The goal here is to point your domain to GitHub's servers by updating its DNS (Domain Name System) records. You've got a couple of options.
- A Records for Apex Domains: An apex domain is the root version of your URL, like
yourdomain.com(without thewww). To make this work, you need to set upArecords that point to GitHub's specific IP addresses. - CNAME Record for Subdomains: A subdomain adds a prefix, like
www.yourdomain.comorblog.yourdomain.com. For these, you'll use aCNAMErecord pointing to your default GitHub Pages URL (username.github.io).
From my experience, going with a CNAME record for a www subdomain is often the simplest and most reliable route. It saves you from headaches if GitHub ever changes its server IP addresses down the line.
Updating Your GitHub Repository
Once your DNS records are saved, it's time to head back to GitHub. You need to tell your repository which domain it should respond to.
Just go to your repository's Settings tab, click on Pages in the sidebar, and find the "Custom domain" field. Type your full domain in there (e.g., www.yourdomain.com) and hit Save.
Pro Tip: Hitting save automatically creates a
CNAMEfile in your publishing source (like thegh-pagesbranch or/docsfolder). This simple text file just contains your domain name. You could also create this file manually yourself to get the same result.
Keep in mind that DNS changes aren't always instant. They need to propagate across the web, which can take anywhere from a few minutes to 24 hours. So, if it doesn't work right away, give it some time.
Enforcing HTTPS for Security
After your domain is successfully linked, a new option will pop up in your GitHub Pages settings: Enforce HTTPS. Don't even think about skipping this—it's essential.
Flipping this switch on encrypts all the data between your visitors and your site, which builds trust and protects their privacy. It's also a signal to search engines that your site is legitimate, which can give you a small SEO boost. If you want to dig deeper into this, our guide on what a custom domain name is covers the security benefits in more detail.
GitHub handles all the heavy lifting by getting a free SSL/TLS certificate from Let's Encrypt for you. With one click, your site is secure, professional, and ready for visitors.
Making Content Management Human with JekyllPad
Okay, you've got the technical side dialed in. Your site is building, your deployment is automated, and everything is humming along nicely. But now comes the real work: creating and updating content. And let's be honest, the standard Git workflow—while a godsend for developers—can be a total non-starter for writers, editors, or marketing folks.
This is where the process often hits a wall. Simple text updates or new blog posts get stuck in a queue, waiting for a developer to handle the git commit and git push. It’s a classic bottleneck that slows everyone down.
That’s exactly the gap a tool like JekyllPad is built to fill. Think of it as a friendly, visual CMS that sits right on top of your GitHub Pages repository. Instead of asking your team to clone repos and fire up local servers, you give them a simple, web-based editor. Problem solved.
Bridging the Divide Between Content and Code
The whole point is to abstract away the Git complexity. For someone who isn't living in a terminal all day, concepts like commits, branches, and pull requests are just intimidating jargon. A visual editor, on the other hand, is familiar territory. It lets them focus on what they do best—writing and structuring content—not wrestling with the underlying tech.
JekyllPad hooks directly into your GitHub account, giving you access to your repositories right from the browser. This tight integration is what makes it so effective. It’s not some separate platform you have to sync up; it's just a more intuitive front-end for the powerful version control you're already using.
Considering GitHub draws in around 14 million daily visitors who spend an average of seven minutes on the site, its reliability and reach are undeniable. JekyllPad taps into this massive ecosystem. For its audience of non-technical creators and content marketers, this means they get a straightforward WYSIWYG editor to manage their work and can publish instantly to GitHub Pages—reaching a global audience without ever touching a Git command or a YAML file. You can dig into more GitHub usage statistics to see just how influential the platform is.
A Look at the Seamless Publishing Experience
Picture this common scenario: a content marketer has a new blog post ready to go. The old way? They write it in a Google Doc, email it to a developer, and wait. The developer then has to convert it to Markdown, add the front matter, commit the file, and push it up. It’s a slow, clunky handoff.
With a tool like JekyllPad, the process becomes self-serve. The marketer logs in, creates a new post, and writes in an editor that feels as natural as any modern word processor.
Here’s a glimpse of the JekyllPad editor. It's clean, distraction-free, and even includes a live preview so you know exactly how things will look.

This interface cleverly combines a familiar editing experience with direct access to the technical metadata, like front matter, that your static site generator needs to build the page correctly.
From Hitting "Save" to a Live Site, Automatically
The real magic happens when you click "Save." Under the hood, JekyllPad orchestrates the entire Git workflow for you:
- Creates a Commit: It translates your saved changes into a proper Git commit, complete with a descriptive message.
- Pushes to Your Repo: That commit gets pushed directly to the correct branch in your GitHub repository.
- Triggers Your GitHub Action: The push immediately kicks off the GitHub Actions workflow you already set up.
The best part? The content creator doesn’t need to know—or care—that any of this is happening. For them, saving the document is publishing it. The automated pipeline handles the rest, building and deploying the changes to your github gh pages site.
This workflow truly opens up content management for your static site. It empowers every team member to contribute directly and efficiently. Developers can get back to developing, and writers can get back to writing. The result is a faster, more collaborative process that gets the most out of github gh pages without demanding a computer science degree from everyone involved.
Got Questions About GitHub Pages? Let's Clear Things Up.
As you start working with GitHub Pages, you’re bound to hit a few snags or have some questions pop up. It happens to everyone. Here are some of the most common issues people run into, along with some practical advice from the trenches to get you sorted out quickly.
How Long Until My Changes Go Live?
This is probably the number one question I hear. The good news is, GitHub Pages is impressively fast. If your site is just a collection of hand-written HTML and CSS files, you’ll often see your updates appear almost instantly after you push a commit—we’re talking under a minute.
Things take a little longer if you're using a GitHub Actions workflow to build your site. The total time will include the build process itself, which might add a minute or two depending on how complex your site is. If you've pushed a change and aren't seeing it, the first thing to try is a hard refresh in your browser (Ctrl+Shift+R on Windows or Cmd+Shift+R on Mac) to bust through any cached files.
Can I Run PHP or Use a Database Here?
This is a big one, and the answer is a firm no. It's crucial to understand that GitHub Pages is built for one thing: serving static content. It hands pre-built files like HTML, CSS, and JavaScript straight to the browser without any server-side magic.
That means no PHP, no Python, no Ruby, and definitely no databases like MySQL or MongoDB. If you need dynamic features, the modern approach is to lean into the JAMstack philosophy. You use client-side JavaScript to talk to third-party APIs.
- Need comments? Plug in a service like Disqus or Commento.
- Need a contact form? Use a tool like Formspree or Netlify Forms.
- Need to display data? Pull it from a headless CMS or a public API with JavaScript's
fetch.
This isn't a limitation; it's a core feature. By ditching the server-side processing, your site becomes faster, more secure, and way easier to scale.
Are There Any Usage Limits I Should Know About?
For a free service, GitHub Pages is incredibly generous, but it's not a free-for-all. There are a few "soft" limits in place to ensure fair use.
- Repository Size: Try to keep your source repo under 1 GB.
- Published Site: The final built site also can't exceed 1 GB.
- Monthly Bandwidth: You get a pretty beefy 100 GB per month.
- Builds per Hour: You're limited to 10 builds per hour.
For most personal sites, portfolios, blogs, or project documentation, these limits are more than enough. You'd have to be running a seriously popular site to hit them. If you do, GitHub support will likely send you a friendly email suggesting a more commercial-grade hosting solution.
Help! Why Am I Seeing a 404 Error?
Ah, the dreaded "404 Not Found" page. Seeing it after you know your deployment was successful is frustrating, but it’s almost always a simple mix-up in the configuration. It's probably the most common headache for newcomers.
Before you panic, run through this quick checklist:
- Where's
index.html? Your site needs anindex.htmlfile in the root of whatever you're publishing from. No index file means there's no default page to serve. - Double-Check Your Repo Settings. Head over to
Settings > Pagesin your repository. Is the right branch selected (mainorgh-pages)? And is the folder correct (/or/docs)? A simple misclick here is a common culprit. - Get the URL Right. For Project sites, the URL is
username.github.io/repository-name. It's case-sensitive, so make sure it matches your repository name exactly. A tiny typo will lead straight to a 404. - Check Your Custom Domain. If you’ve set up a custom domain, make sure the
CNAMEfile is present and correct, and that your DNS records are all pointing where they should be.
Navigating these little quirks is just part of the process. With these fixes in your back pocket, you can spend less time troubleshooting and more time building something awesome.
Ready to make content updates a breeze? JekyllPad provides a visual, browser-based CMS that connects directly to your GitHub repository. It transforms complex Git commands into a simple "save" button, so anyone on your team can publish changes effortlessly. See for yourself at https://www.jekyllpad.com.