
So you've decided to start a blog. That's fantastic. The first few steps usually involve finding your niche, figuring out what you want to write about, and then comes the big one: choosing your platform.
For a long time, the only real game in town was a traditional Content Management System (CMS) like WordPress. And while it’s a powerhouse, it often brings along a world of maintenance, security updates, and monthly hosting bills. But what if there was a better way?

Why A Modern Blog Setup Makes Sense
Today, you can take a much smarter path by using a static site generator (SSG) and hosting it for free on a service like GitHub Pages. The concept is simple but incredibly effective: instead of your website living in a complex database, it’s just a collection of plain text files. When you're ready to publish, the generator quickly builds a lightweight, pre-made version of your entire site.
This approach comes with some serious perks:
- Insanely Fast Performance: Static sites load in a flash. There's no database to ping or server-side code to run, which means your readers get an almost instant experience. Google loves fast sites, too.
- Rock-Solid Security: With no database to hack or vulnerable plugins to exploit, static sites are naturally far more secure. You can spend less time worrying about security patches and more time writing.
- Basically Zero Cost: GitHub Pages offers world-class hosting for your static site completely free. That means no more monthly hosting fees eating into your budget.
- Simple Version Control: Because your blog lives on GitHub, every single change you make is tracked. If you ever make a mistake or want to go back to a previous version of an article, it's just a few clicks away.
Let's quickly compare the two approaches side-by-side to see how they stack up.
Traditional vs. Modern Blog Setup Comparison
| Feature | Traditional CMS (e.g., WordPress) | Modern Static Site (SSG + GitHub Pages) |
|---|---|---|
| Performance | Slower; relies on database queries. | Blazing fast; pre-built HTML files. |
| Security | Requires constant updates and security plugins. | Inherently secure with a minimal attack surface. |
| Cost | Monthly hosting fees, premium themes/plugins. | Completely free hosting. |
| Maintenance | Regular updates for core, themes, and plugins. | Virtually zero maintenance required. |
| Technical Skill | User-friendly dashboard, but can get complex. | Historically required command-line skills. |
As you can see, the modern static site approach wins on almost every front, except for one historical hurdle: the technical setup.
Closing The Technical Gap
For years, the biggest catch with this whole static site thing was the setup. It was a workflow built by developers, for developers. You had to be comfortable with the command line, Git, and editing configuration files just to get started—a real roadblock for most writers and creators.
This is where a tool like JekyllPad completely changes the game.
JekyllPad is the missing piece of the puzzle. It’s a clean, web-based editor that connects right to your GitHub account and gives you a simple interface to write posts, upload images, and manage your blog's files. You get all the power of the modern developer workflow without ever needing to open a terminal window.
It takes the technical headache out of the equation, finally making the speed, security, and cost benefits of a static site truly accessible to everyone.
An Audience Is Waiting For You
Getting your tech stack right is more important than ever because the audience for great content is enormous. As of 2025, there are over 600 million blogs online, with around 83% of all internet users—that’s roughly 4.58 billion people—actively reading them. The appetite for quality writing is huge, and you can learn more from these eye-opening blogging statistics.
By choosing a modern, static-first approach, you’re doing more than just starting a blog. You're building a fast, secure, and future-proof home for your content that puts the reader's experience first. It frees you up to focus on the one thing that truly matters: creating something worth reading.
Picking Your Static Site Generator and Theme
Alright, this is the first big decision you'll make, and it sets the foundation for your entire blog. You need to pick your tools: a Static Site Generator (SSG) and a theme.
Think of the SSG as the engine. It takes your simple text files—your future blog posts—and churns out a complete, incredibly fast website. This is the modern, efficient way to build a blog, and you don't need to be a developer to get it right. The community has really honed in on a few fantastic options.
Meet the Top Static Site Generators
Which SSG you choose will shape how you manage your blog and how fast it performs. For most people starting out, the choice boils down to three heavy hitters: Jekyll, Hugo, and Eleventy. They're all excellent, but each one has a slightly different personality.
Jekyll: This is the original, the one that started it all. Jekyll is famous for its simplicity and its seamless connection with GitHub Pages. Since it’s been around for so long, there’s a massive community, meaning you’ll find tons of tutorials and themes. If you're new to this, Jekyll is a super solid, well-supported place to start.
Hugo: If speed is what you're after, Hugo is your tool. It's known for blazing-fast build times—we're talking milliseconds, even for blogs with thousands of posts. It’s a great pick if you plan on publishing a massive amount of content or just can't stand waiting.
Eleventy (11ty): As a relative newcomer, Eleventy has gained a lot of fans for its flexibility. It’s built on JavaScript and doesn’t lock you into a rigid structure, which developers love. But don't let that fool you; it's still surprisingly straightforward for beginners.
If you want to get into the weeds on these, our guide on the best static site generators breaks down the pros and cons in much more detail.
Finding the Perfect Theme for Your Blog
Once your engine is chosen, it's time for the fun part: picking a theme. A theme is basically a ready-made design for your blog. It handles the layout, fonts, colors—the whole look. This is your shortcut to a professional-looking site from day one, no coding required.
You'll find hundreds of themes out there, both free and paid. The trick is to find one that not only looks good but is also well-maintained and easy to customize.
When you're shopping around, here's what I'd look for:
- Clear Documentation: Good themes come with instructions. A
README.mdfile or a small documentation site is a green flag that you won't be left guessing how to change things. - Responsive Design: This is non-negotiable. Your blog has to look just as good on a phone as it does on a big monitor. Most themes are responsive now, but always pull up the demo on your phone to be sure.
- Clean and Minimalist Style: Your writing should be the star of the show. Overly busy designs can distract from your content. Simple and clean is almost always the better choice for a good reading experience.
A theme is more than just a pretty face for your blog. It’s the framework that ensures your content is readable, accessible, and enjoyable for your audience. A good theme saves you countless hours of design and development work.
While you're laying this groundwork, it's also the perfect time to think about your blog's address online. You'll need a unique domain name, so it’s worth taking a moment to understand how domain name registration works. This will be your brand's home on the web.
With an SSG selected and a theme you love, you’ve just knocked out the two most important technical decisions. You've got the engine and the body of the car; next, we’ll put them together and get you on the road.
Alright, you've picked your tools. Now for the fun part: getting your blog live on the internet. We're going to use GitHub Pages, a fantastic and totally free hosting service that’s practically tailor-made for the kind of modern blog we’re building.
First things first, you'll need a free GitHub account. If you don't have one, it takes just a minute to sign up. Think of GitHub as a specialized cloud drive, but for code and text files. It's the perfect place to safely store your blog's theme and all your future posts.
Laying the Foundation for Your Blog
With your account ready, the next move is to create what's called a repository. This is just a fancy name for a project folder on GitHub. For GitHub Pages to work its magic, this repository has to be named in a very specific way: your-username.github.io. Just swap your-username with your actual GitHub username.
This special naming convention tells GitHub, "Hey, the files in here are for a website—please publish them!" It's the digital equivalent of pouring the concrete foundation for a new house. You're establishing the exact web address where your blog will live.
Once the repository is created, you’ll upload the theme files you chose earlier. This is usually as simple as dragging and dropping the theme’s folder directly into your new repository.
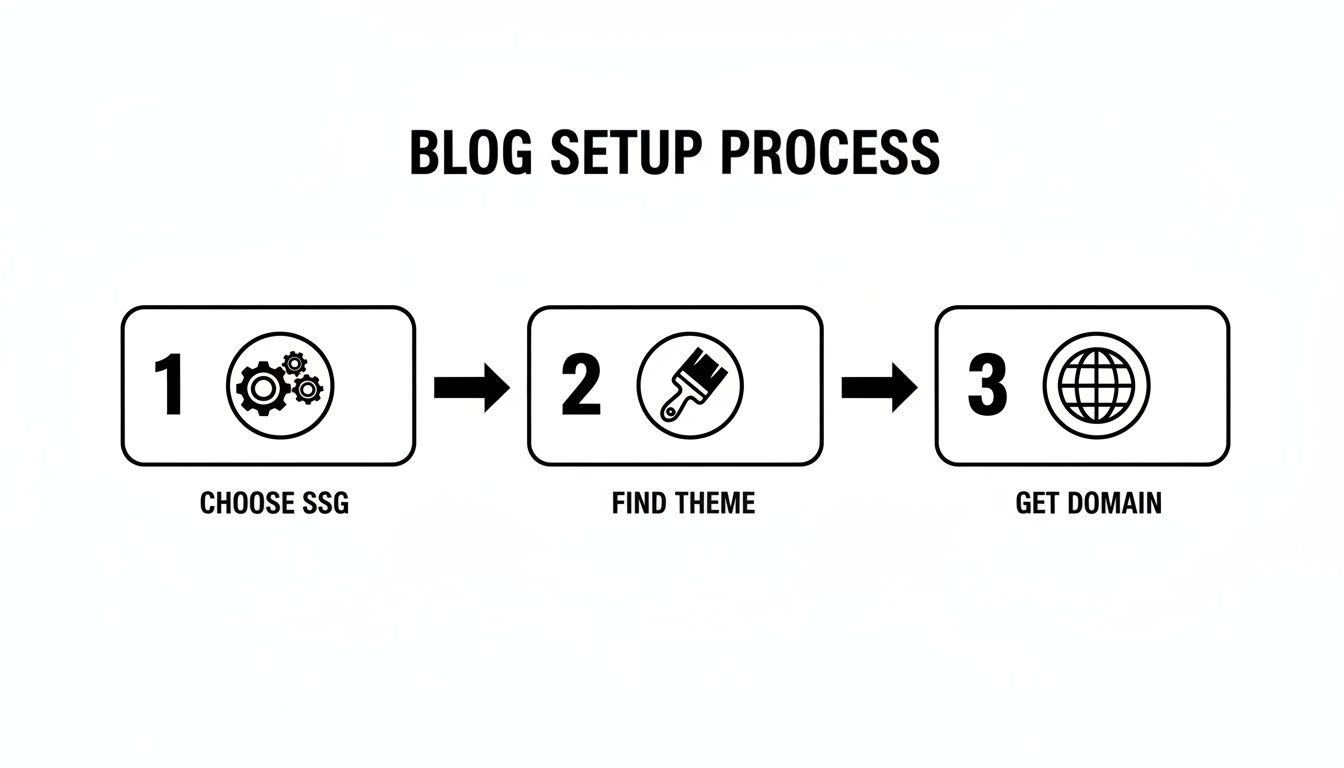
As the diagram shows, the whole setup really boils down to three key decisions: choosing your static site generator (the engine), finding a theme (the look), and getting it online (the home).
How to Sidestep the Technical Headaches
Now, this is usually the point where things get tricky. The traditional route would have you installing software, firing up the command-line terminal, and wrestling with local server configurations just to see a preview. Frankly, it’s a huge turn-off for most people who just want to write.
This is exactly why we built JekyllPad. Instead of dealing with a developer's complicated toolkit, you simply connect your GitHub account to JekyllPad in a couple of clicks. It bridges the gap, giving you a clean, visual interface to manage everything happening in your GitHub repository.
JekyllPad handles all the technical heavy lifting behind the scenes. It completely removes the need for command-line tools, local development environments, and complex deployment scripts. You get all the benefits of a powerful, modern setup with none of the usual friction.
There's no software to install and no code to run on your machine. Your blog’s files, which are always stored safely in your GitHub repository, become instantly editable through a simple web dashboard.
Your New Blogging Command Center
After connecting JekyllPad to your your-username.github.io repository, you've essentially created a command center for your blog. You can see all your theme files, tweak configuration settings, and easily find the folders where your posts will go. It demystifies the entire file structure.
This is the "aha!" moment for so many bloggers. You've successfully sidestepped the most intimidating part of building a modern blog. Instead of a blinking cursor in a black terminal window, you have an intuitive editor ready and waiting for your first post.
For a more detailed walkthrough of the hosting side, our guide on how to use GitHub Pages covers all the bases.
The heavy lifting is done. Your blog now has a live web address, a professional design, and a powerful, user-friendly tool to manage it. You’ve just built a fast, secure, and free platform for your content. Now, onto the best part: writing your first post.
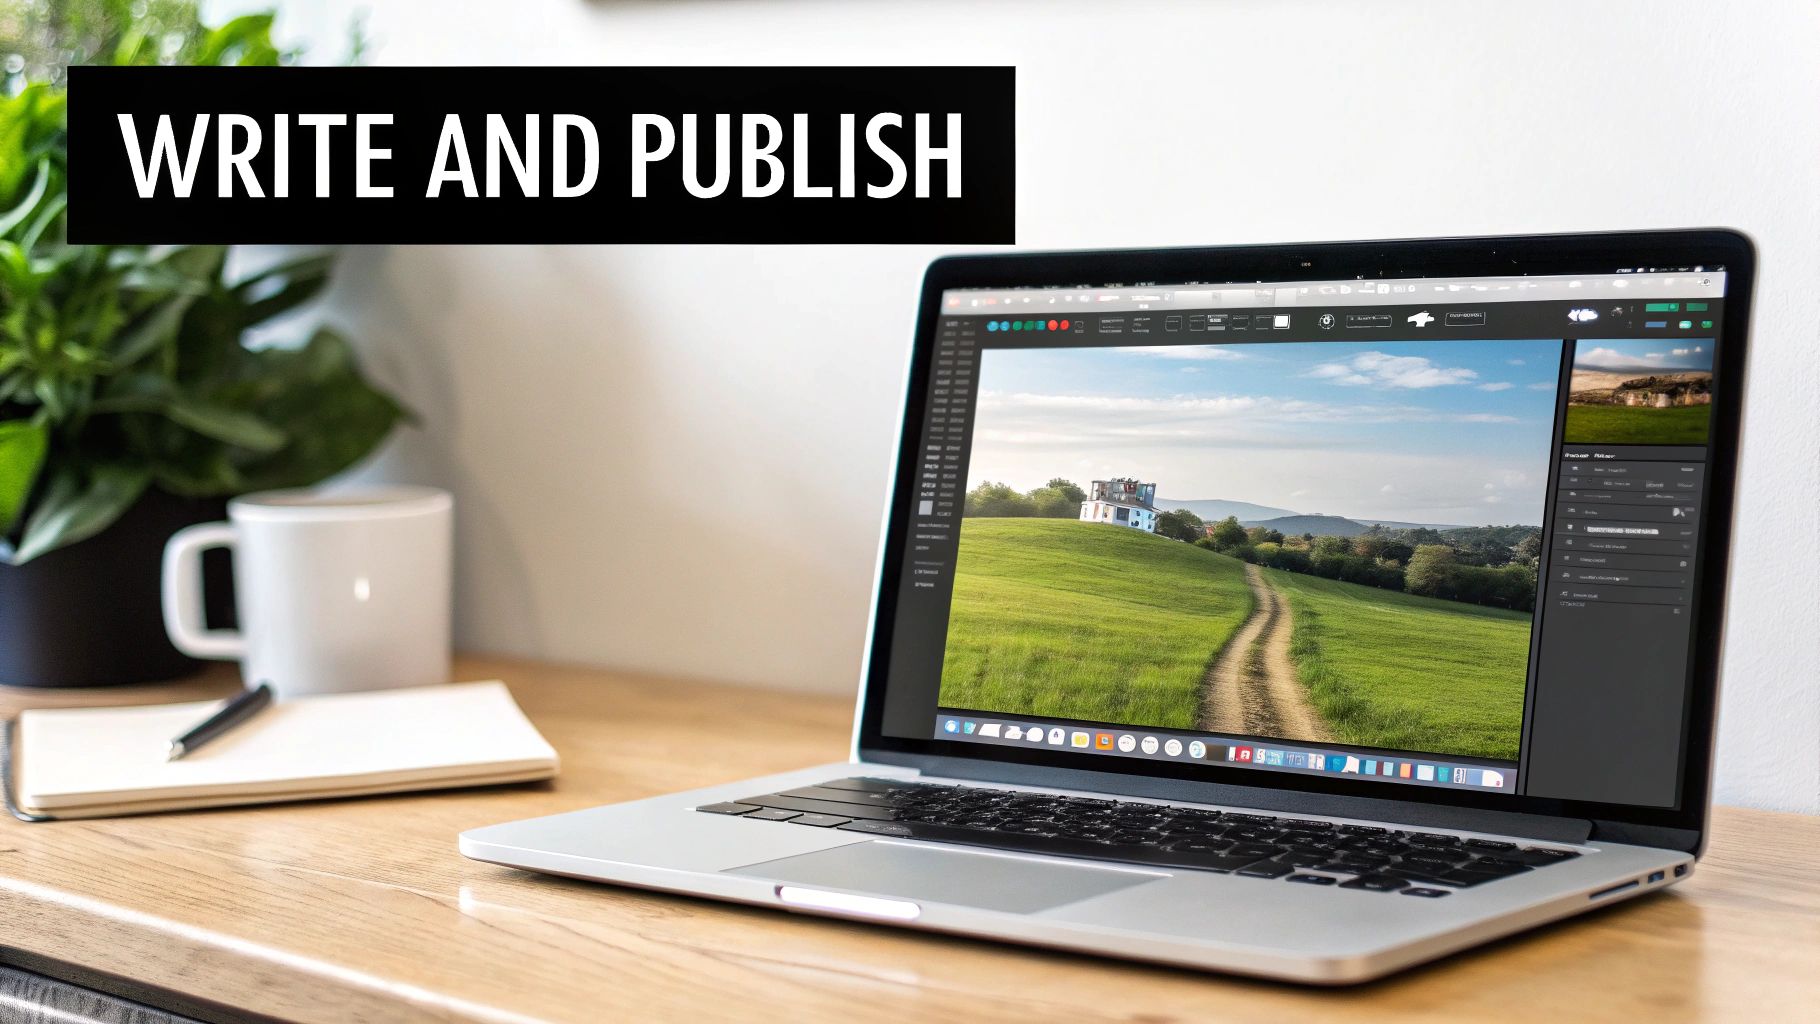
4. Writing and Publishing Your First Post
You've done the heavy lifting on the technical side. Your blog is set up, the theme is in place, and now it's time for the fun part: actually writing. This is where your ideas finally hit the page, and with a tool like JekyllPad, you can forget about all those configuration files and just focus on creating great content.
The writing experience feels a lot like using a familiar word processor, but it’s packed with features designed specifically for modern blogging. You can write, format your text, and drop in images—all from one intuitive visual editor.
Composing Content in a Visual Editor
Getting started in JekyllPad is as easy as clicking "New Post." This pulls up a clean, distraction-free writing space where you can just start typing. The editor supports both rich text and Markdown, so you can work in whichever format feels most natural to you.
One of the best parts is the real-time preview. As you write, a live preview of your post appears right next to the editor, showing you exactly how it will look on your site. No more saving, switching tabs, and refreshing just to see if your formatting is right. It’s a tight feedback loop that keeps you in a creative flow.
As you start writing, remember that your content is a conversation with your reader. A big part of making that connection is figuring out how to find your writing voice so you can build an authentic relationship from day one.
Managing Post Metadata with Front Matter
Every post you write needs a small, but critical, block of data at the top called front matter. This metadata tells your blog’s engine the essential details: the title, publication date, author, and any tags for organization.
Normally, you'd have to edit this by hand in a text block, which often looks something like this:
title: My Awesome First Post date: 2024-10-26 author: Jane Doe tags: [getting-started, tech]
That can be a bit daunting for newcomers and it's easy to make a typo that breaks things. JekyllPad completely removes that headache. Instead of raw text, you get simple form fields. Type your title into a "Title" box, pick a date from a calendar—it's that easy. This makes managing your post's metadata foolproof.
Think of front matter as the control panel for your blog post. It dictates how your content is sorted, displayed, and categorized across your site. Simplifying it is a huge win for making modern blogging accessible to everyone.
The Magic of Automatic Version Control
Here's where things get really powerful, and it all happens behind the scenes. Every time you save a draft in JekyllPad, your changes are automatically saved as a new "commit" in your GitHub repository. Put simply, this means every single version of your article is tracked and stored.
This built-in version control is an incredible safety net. Accidentally delete your best paragraph? No big deal, just roll it back. Want to see what the post looked like three days ago? It’s all there. You get a complete history of your work without ever touching a single Git command. It’s enterprise-grade backup, made effortless.
This is one of the core reasons this modern workflow is so fantastic. For a closer look at styling your writing, check out our guide on how to properly https://www.jekyllpad.com/blog/format-blog-post for readability.
Publishing Your Post to the World
Alright, your draft is polished and the metadata is set. You're ready to go live. Publishing couldn't be simpler. Since JekyllPad is tied directly to your GitHub repository, hitting "publish" is just a final save of your work.
That one click kicks off the GitHub Pages build process. GitHub grabs your new file, runs it through Jekyll, and rebuilds your entire website with the new post included. Within a minute or so, your article is live for everyone to see. No FTP clients, no complicated deployment scripts—just a simple save that pushes your words out to the world.
Essential Tips for Managing and Growing Your Blog
Getting your blog live is a huge milestone, but the real work—and the fun—is just getting started. Now, you get to shift from the technical side of things to the creative strategy that will give your blog its unique voice and start drawing in readers. This is all about building momentum for the long haul.
One of the first things you'll want to do is set up a custom domain. That default your-username.github.io address works just fine, but a custom domain like yourbrand.com instantly makes your site look more professional. It’s also much easier for people to remember, which is a big win for building your brand.
With your new domain in place, it’s time to think about your content and how you'll keep it organized. Honestly, one of the most effective things you can do for blog growth is to publish on a consistent schedule.
Build a Content Strategy That Works
Publishing regularly tells both your audience and search engines that your blog is a reliable source of fresh information. To keep up a steady pace without burning out, you need a plan. Don't worry, this doesn't have to be some complex, color-coded spreadsheet. A simple content calendar can be a lifesaver.
Start by just jotting down a big list of topic ideas. What questions does your ideal reader have? What problems are they trying to solve? Having a bank of drafts and ideas ready to go means you'll never be scrambling for a topic at the last minute.
Here are a few simple ways to organize your creative flow:
- Plan with quarterly themes: You could dedicate each quarter to a broad subject. For instance, a food blog might focus on "Summer Grilling" for Q3 and then switch to "Holiday Baking" for Q4.
- Batch your tasks: Instead of doing everything at once, try dedicating specific days to different tasks—one day for brainstorming, another for outlining, and a couple for writing and editing. It’s amazing how much more you can get done.
- Use a simple tool: A basic spreadsheet or a free Trello board is more than enough to map out your schedule, see what’s in progress, and hit your deadlines.
A content calendar isn't meant to be a strict rulebook; it's a roadmap. It gives you structure, takes away the pressure of figuring out what to write next, and helps you publish consistently—which is how you build a loyal following.
Master Basic On-Page SEO
Search Engine Optimization (SEO) sounds way more complicated than it is. The fundamentals are actually pretty simple, and you can handle them right inside your normal writing routine. Getting these basics right is how you help people find your blog on search engines like Google, and a tool like JekyllPad makes it even easier.
On-page SEO is all about optimizing the individual pieces of your posts. Remember that "front matter" we talked about earlier? Think of it as your SEO control panel. When you fill out those fields thoughtfully, you're sending clear signals to search engines about what your content is about.
For every post, make a habit of checking these four things:
- A Compelling Title: Your title needs to grab a reader's attention while also including your main keyword in a natural way.
- A Strategic Meta Description: This is the little blurb that shows up under your title in search results. Write a punchy summary (around 155 characters) that makes people want to click.
- A Clean URL Slug: Keep the URL for your post short, sweet, and descriptive.
- Relevant Tags: Use tags to group related posts. This helps both users and search engines understand how your content is organized.
Making these small tweaks a regular part of your process will make a huge difference in your blog's visibility over time. It’s all about making your hard work discoverable. This steady approach to on-page SEO is a critical part of learning how to set up a blog that doesn’t just exist but actually grows into a go-to resource.
Common Questions About This Blogging Method
Whenever you're trying a new approach, a few questions are bound to pop up. This way of building a blog is incredibly powerful, but it's definitely not the same as the old-school methods you might be used to. Let's tackle some of the most common questions head-on so you can get started with total confidence.
Is This Really a Free Way to Start a Blog?
Yep, 100%. The whole setup is built around free, high-quality tools, which is fantastic when you're just getting started. GitHub Pages offers free hosting for a personal site, and the static site generators themselves—like Jekyll or Hugo—are open-source, so they don't cost a dime.
The only thing you might pay for is a custom domain name, which I highly recommend for a professional touch. But the core hosting and software? Completely free. You get to skip the monthly hosting bills that come with traditional platforms.
Do I Need to Be a Coder or a Git Expert?
Absolutely not. That’s the whole point of adding a tool like JekyllPad into the mix. Under the hood, yes, this is a developer's workflow. It uses Git for version control and GitHub for hosting. But a visual editor like JekyllPad puts a friendly face on all that complexity.
It handles all the technical heavy lifting for you. You can write your posts, tweak settings, and publish everything without ever needing to open a terminal or learn a single Git command. It’s all about making this modern, high-performance setup accessible to creators who just want to write.
This setup is designed to give you the speed and security of a pro developer's toolkit, without you having to become a pro developer. It’s the best of both worlds.
Can I Move My Site from a Platform Like WordPress?
You sure can. In fact, moving from WordPress is a really common reason people explore static sites in the first place—they're chasing better performance and security. There are a bunch of tools out there made specifically to export your WordPress content into Markdown files, which is exactly what you need for a static site generator.
It does take a bit of upfront work to get your content moved over and set up a new theme. But the payoff is huge: a faster, more secure site with way less maintenance. For a lot of bloggers, it's a smart long-term move. Once your content is sitting in a GitHub repository, JekyllPad can pick it up from there.
What Are the Downsides or Limitations?
The main trade-off is the lack of built-in dynamic features. A traditional CMS like WordPress handles everything on a server, so things that require real-time interaction are easy to add with plugins. With a static site, you'll need to think a little differently.
Things like:
- User comment sections
- Contact forms that send emails
- E-commerce and shopping carts
These aren't impossible, but they require plugging in third-party services. For example, you might use a service like Disqus for comments or Formspree for your contact form. It's totally doable, just a different way of working. This approach shines brightest for content-focused websites where speed and rock-solid security are the top priorities.
Ready to build your blog without the technical drama? JekyllPad gives you the visual editor and simple publishing workflow you need for a fast, secure, and free static site. Start for free on jekyllpad.com.